


 0
0
 0
0
Your basket is empty...
Hints and tips
Capillary GC column installation
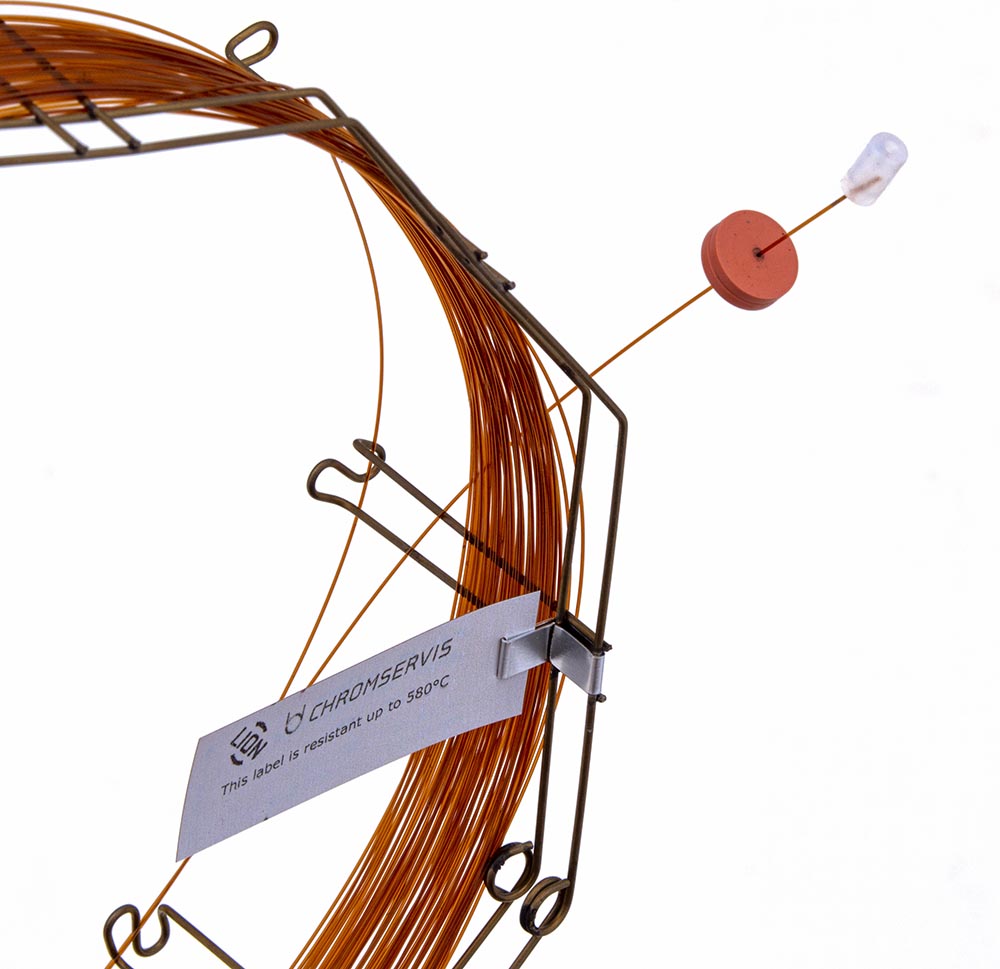 Brief procedure for column installation
- Cool all heated zones of GC
- Check gas purifiers and if they are spent, replace them.
- Clean injector and detector
- Replace injector/detector liners with new ones.
- Replace critical injector and detector seals.
- Replace septum in the injector.
- Set make-up and detector gas flow rates.
- Carefully inspect the column for damage or breakage.
- Install a nut and ferrule on each end of the column.
- Cut 10 centimeters from each end of the column. Use a sapphire scribe or ceramic scoring wafer to cut fused silica capillary columns. Use the serrated edge of a ceramic scoring wafer or the edge of a sharp file to cut metal capillary columns. See our catalogue for capillary cuting tools.
- Mount the capillary column in the oven using a bracket that protects the column from becoming scratched or abraded.
- Insert column the appropriate distance into the inlet as indicated in the instrument manual.
- Install the column so that the capillary does not touch the oven walls.
- Set the approximate column flow rate by adjusting the head pressure to the value listed on the test chromatogram included with the column.
- Set split vent, septa purge, and any other applicable inlet gases according to the instrument specifications.
- Confirm the flow by immersing the column outlet in a vial of solvent (acetone or isopropyl alcohol).
- Insert column the appropriate distance into the detector as indicated in the instrument manual.
- Check for inlet and outlet leaks using a thermal conductivity leak detector. Do not use soaps or liquid-based leak detectors or the column may be damaged.
- Set injector and detector temperatures. Turn the detector on when the temperatures have equilibrated. Caution - do not exceed the phase's maximum operating temperature!
- To set the proper dead time (linear velocity), inject methane or a non-retained substance compatible with the detector being used.
- Verify system integrity by checking the dead volume peak. It should not tail.
- Condition the column at its maximum operating temperature to stabilize the baseline. (See the test chromatogram included with the column for the maximum temperature.)
- Set oven to appropriate temperature and inject methane or an appropriate unretained substance, again to set the proper linear velocity.
- Inject a duplicate of the original test mixture or your specific test mixture to confirm proper installation, system, and column performance.
- Calibrate the instrument and inject samples.
Note: If the column is new, you have to run conditioning procedure prior setting the proper dead time.
GC Column conditioning
Conditioning at elevated temperatures without flow will permanently damage or destroy the performance of the capillary column. Conditioning with an oxygen leak present causes the column bleed and destroys its utility at high operating temperatures. Therefore prior the conditioning a column:
- Check proper carrier gas flow settings
- Make a leak test to verify that there is not oxygen present in the system
GC column conditioning:
- Install the column to the injector. Do not connect the column to the detector. Leave the column end in the GC oven.
- Set the GC oven to 40°C
- Hold this temperature 15 minutes
- Set the temperature gradient to 10°C/min
- Set the maximum operation temperature 20°C above your final temperature of the GC temperature program (the maximum temerature must be 25°C below the column maximum operating temperature)*
- Leave the column at high temperature ovenight until the baseline stabilizes. If the column is pre-conditioned, leave tha maximum temperature for 2 hours and untill the baseline stabilizes.
*Note: Overnight conditioning is not necessary with pre-conditioned columns. Read carefully the conditioning instructions supplied by the column manufacturer. They have priority to the general conditioning recommendation above .
HPLC connections (TN #539)
This technical note shows possible types of connection between column and LC system. Bad connection may influence peak separation and should be avoided. The right connection is presented below.

- TN_539_HPLC connections
1791 kB
Allowable Adjustments to HPLC Methods
Chromservis HPLC columns corresponding to USP and Eur. Pharmacopoeia methods and the extent to which the various parameters of a chromatographic test may be adjusted without fundamentally modifying the pharmacopoeial analytical procedures are listed in this technical note. Changes other than those indicated require revalidation of the procedure.

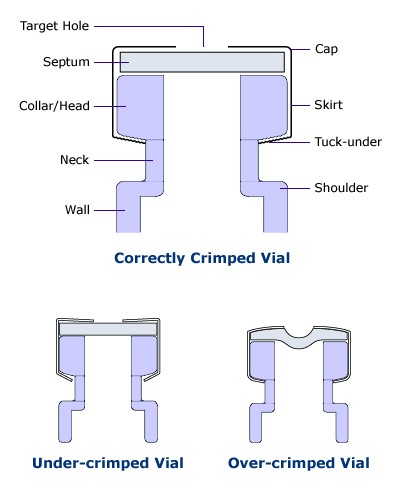
HOW TO CORRECTLY CRIMP VIALS
Crimp vials are excellent sample containers for automatic dispensers of gas and liquid chromatographs and for storing samples or calibration solutions. The technique of closing them is very important for proper tightness. Due to leakage caused by improper sealing, solvent evaporation or loss of analytes may occur.
A correctly closed vial can be recognized by the fact that its cap rotates with difficulty after closing and the septum is straight.
A vial that is closed with too much force can be recognized by the fact that its cap cannot usually be turned at all and, in addition, it has a bent septum (inwards). If the septum is punctured by the needle of the microsyringe, the septum will be heavily stressed and thus the vial's tightness will be compromised.
A vial that does not have a properly closed cap due to the low power of the crimping pliers is manifested by easy rotation of the cap and, in some cases, unfastened aluminum material around the lower edge of the vial neck.
You can set the correct force of the closing pliers.
In older types of pliers, the force is adjusted by turning the Allen key inside the jaws. Pliers also have a stop screw, which is used to set the safety distance, in order not to use too much force and thus to avoid leakage or even mechanical damage to the vial.

Troubleshooting
Many GC and LC problems can be avoided with routine preventive maintenance. If you are seeking the cause of the chromatography problem, go step by step. Never make more changes in your instrument at the same time, otherwise you will never find, what caused the problem.
Select your category of chromatography to read more about the troubleshooting:
GC troubleshooting

LC troubleshooting

Signal to noise ration improvment in GC
 Today's laboratory needs are:
- Lower detection and quantitation limits (LOD, LQD)
- Stability improvment in GC and GC/MS systems
- More inert and stable GC parts (columns, septa, vials, liners, ...)
Lower detection and quantitation limits can be achieved by:
- Reducing the Noise
- Increasing the signal
GC septa selection
Agilent GCs
| Injector type | Instrument | Dimensions |
|---|---|---|
| Split-splitless | 7890, 6890, 6850, 5890, 5880A | 11 mm |
| Split-splitless | 5880, 5700 | 9.5 / 10 mm |
| PTV | 7890, 6890, 6850, 5890, 5880A | 11 mm |
| On-column | 7890, 6890, 6850, 5890 | 5 mm |
DANI GCs
| Injector type | Instrument | Dimensions |
|---|---|---|
| Split-splitless | Master, GC1000 | 12 mm |
| PTV | Master, GC1000 | 12 mm |
Perkin-Elmer GCs
| Injector type | Instrument | Dimensions |
|---|---|---|
| Split-splitless | Auto SYS, Auto SYS XL, 8000, 900, 990, Sigma | 11 mm |
Shimadzu GCs
| Injector type | Instrument | Dimensions |
|---|---|---|
| Split-splitless, PTV | 2010, 2014, 17A | "plug-septa" |
Varian GCs
| Injector type | Instrument | Dimensions |
|---|---|---|
| Packed column | 9.5 / 10 mm | |
| 1079, 1078 | 10 / 11 mm | |
| 1177 | 9 mm | |
| 1075 / 1077 | 11 mm |
Thermo Scientific GCs
| Injector type | Instrument | Dimensions |
|---|---|---|
| Split-splitless | Trace, 8000, 8000 TOP | 17 mm |
| PTV | 8000 | 17 mm |
| Split-splitless | Trace, GC9001 | 9.5 mm |
Syringes
Syringe Cleaning and Maintenance
Chromatography syringes are the finest quality precision fluid measuring devices available. With proper care and handling, syringes will provide unsurpassed performance in precision fluid measuring year after year. The life of your syringe is directly related to its cleanliness!
Some solvents, such as halogenated hydrocarbons, may attack and deteriorate the highly resistive adhesives (cements) used to affix needles and other terminations to Hamilton syringes, which may result in frozen plungers and plugged needles.

Cleaning Syringe Barrels
To clean Hamilton syringes, it is best to use solvents known to be effective in solvating the sample and preferably are non-alkaline, non-phosphate and non-detergent based. A biodegradable, non-phosphate, organic Cleaning Concentrate is available from Hamilton (ordering number 18311).
Rinse the syringe thoroughly after use with deionized water, acetone, or another solvent compatible with the sample. Allow the syringe to air dry. Avoid prolonged immersion of the syringe while cleaning.
MICROLITER™ Syringes (Series 600, 700, 800 and 900)
- Rinse the syringe thoroughly with a solvent known to be effective in solvating the sample. Residual dissolved solids may result in frozen plungers and plugged needles.
- To clean the plunger, remove it from the syringe barrel and gently wipe with a lint-free tissue. Reinsert the plunger into the barrel and pump deionized water, acetone or another solvent compatible with the sample through the needle and syringe. Allow syringe to air dry. When working with dissolved solids, storing the plunger outside of the syringe will reduce the possibility of frozen plunger.
GASTIGHT® Syringes (Series 1000, 1700 and 1800)
- Rinse the syringe thoroughly with a solvent known to be effective in solvating the sample. Residual dissolve d solids may result in frozen plungers and plugged needles.
- To clean the plunger, remove it from the syringe barrel and gently wipe with a lint-free tissue. Insert the plunger into the barrel and pump deionized water, acetone or another solvent compatible with the sample through the needle and syringe. Allow syringe to air dry. When working with dissolved solids, storing the plunger outside of the syringe will reduce the possibility of frozen plunger.
Syringe Storage
We recommend to store syringes in the original packaging. This with help to protect the syringe, and allows for easy identification. Remove product description label from the end of the box, and placing it to the outside packaging. This will make re-ordering the same syringe quick and easy.
Thermal desorption
 In this section you will finde informations important in the area of thermal desorption. It is quite difficult analytical technique and these informations can help you with your work with it. If you do not find required information, do not hesitate to contact our specialists.
Material emission monitoring